Filters Overview
ADBLogger introduces a flexible and powerful filtering system to help you manage Android logs more effectively. By applying filters, you can focus on the log messages that are critical for your debugging tasks.
Creating and Managing Filters
Filters let you specify criteria that log entries must meet to be displayed in the console. Manage filters through a dedicated interface where you can toggle, create, edit, or delete filters directly within Unity.
Accessing Filters
- Navigate to the console toolbar and click the Filters toggle button. This opens the filter list view with all stored filters for the current device.
- Filters are stored per device under
../ADBLogger/Configs/Consoles/Filters, with each filter file named after the device ID.
Creating a New Filter
Manual Creation: Click the [+] button at the top of the filter list view. This opens a popup where you define the filter's name and criteria.
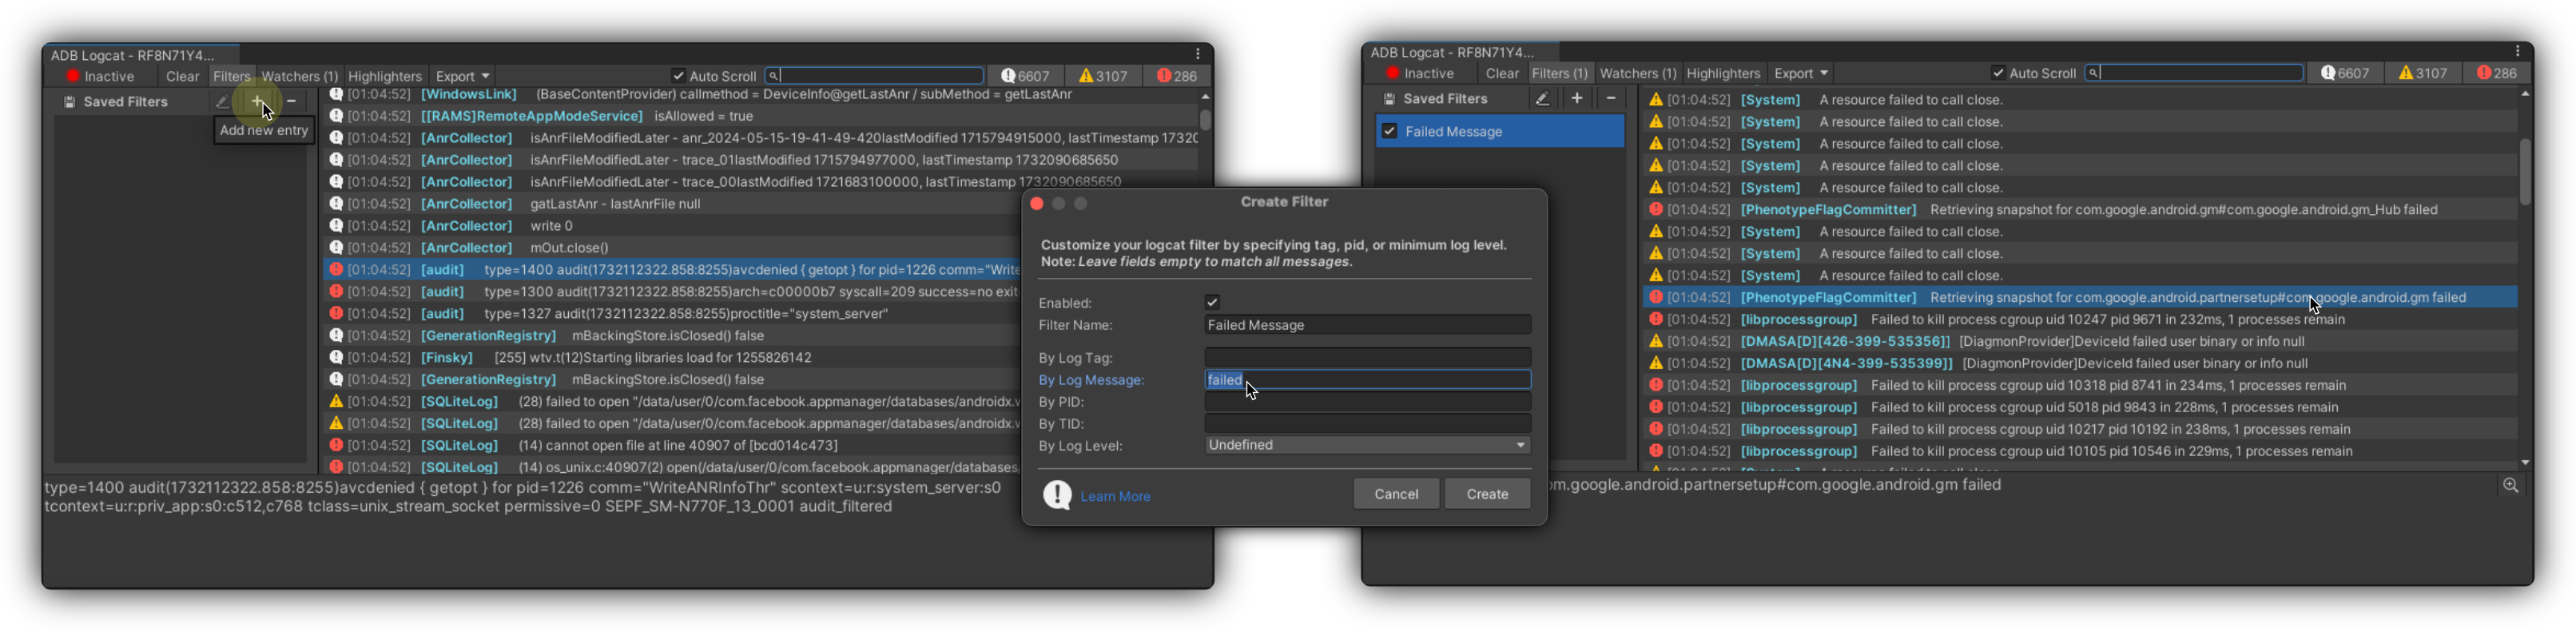
| Field | Description |
|---|---|
| Name | Unique identifier for the filter |
| Log Tag | Filters log entries by their tag |
| Log Message | Filters entries containing specific messages |
| Process ID (PID) | Shows only logs from a specific process |
| Thread ID (TID) | Filters logs by thread identifier |
| Log Level | Minimum severity level of logs to display |
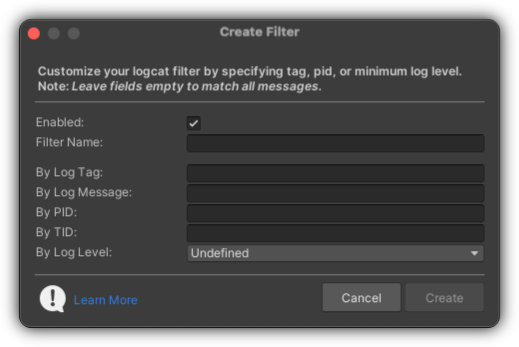
Empty Fields
Leaving a field empty will match all entries for that criterion.
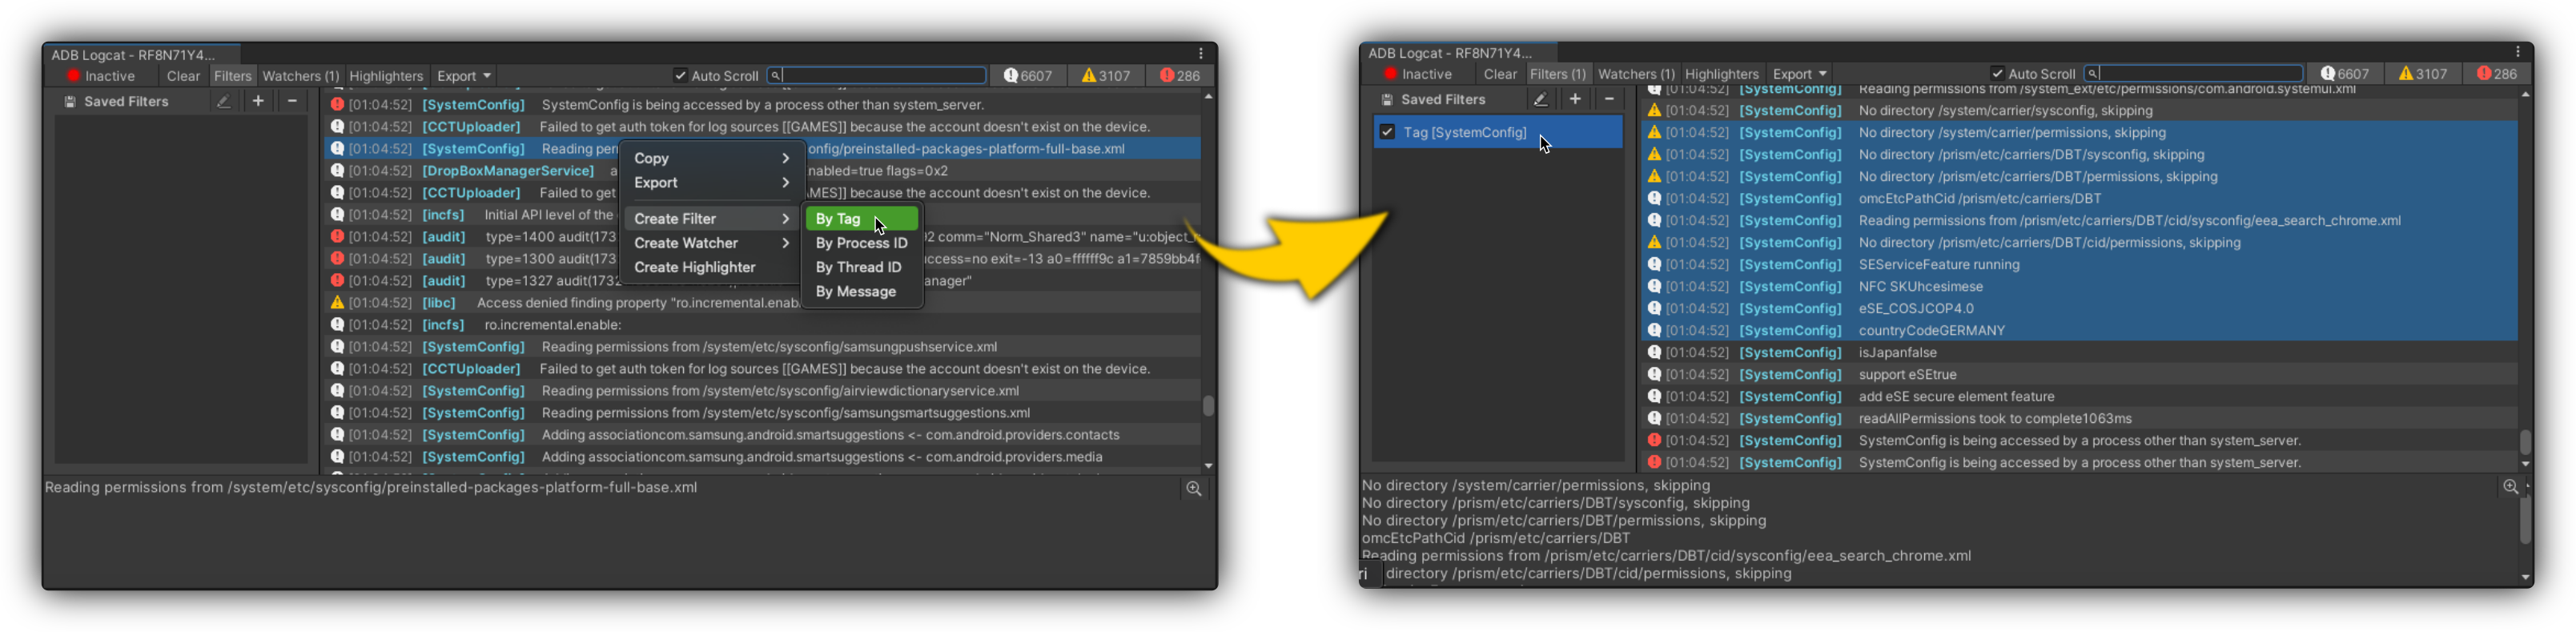
Quick Shortcut: Right-click on a log entry in the console log list and select Create Filter from the contextual menu. Choose to filter by Tag, Process ID, Thread ID, or Message. This option is not available when multiple entries are selected.
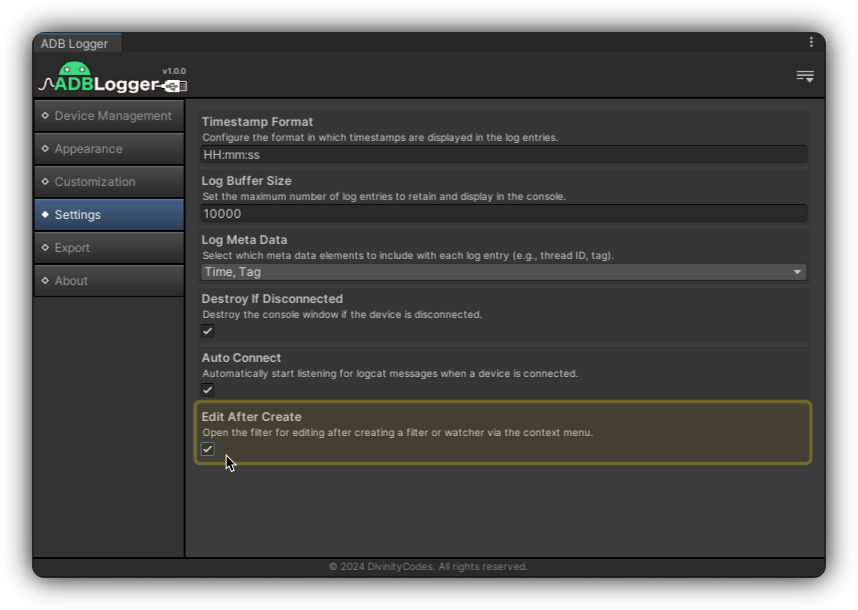
Edit After Create
Enable the Edit After Create preference to automatically open the edit popup for newly created filters.
Editing Filters
Select a filter in the list and choose Edit from the right-click menu. The filter popup opens pre-populated with the current settings.
Deleting Filters
Select a filter and choose Delete from the right-click menu. Confirm the deletion to remove it from your project.
Pair filters with highlighters and watchers, or return to the console overview.
For support regarding the Filters feature, visit our Support section or FAQ page.